


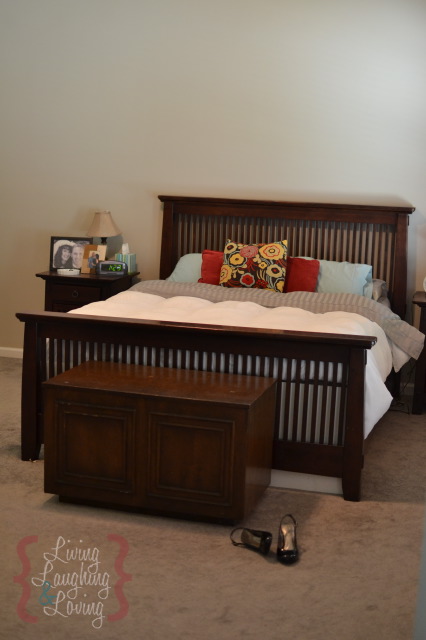
I promised you more details on the great find I snagged at my Goodwill that ended up serving us so well at the foot of our bed.
This is one of those pieces that I’m really enjoying showing to people who visit.
Probably because it was SO cheap and it’s something that went from not very usable or worthwhile to something pretty and functional.
That makes me pretty happy.
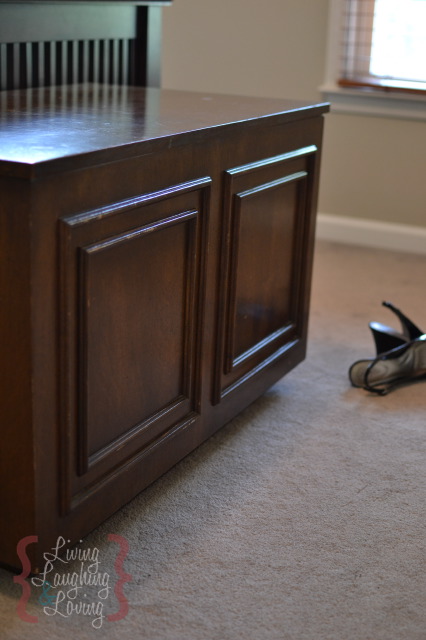
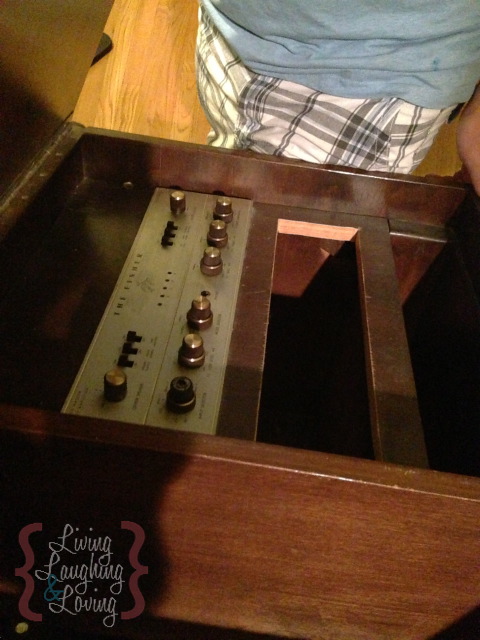
I really don’t even know exactly what to call this thing. I think the tag at GW said something about a sound board console thing. It’s definitely from the 1970’s or somewhere in that vicinity and came with a lot of dust and a lovely musty odor.
I overlooked all that and saw some pretty sweet potential! I was really impressed that it had the safety hinges on the lid which are standard now a days, but not so much back in this baby’s era. This thing is made of real wood AND it’s on wheels.
My sweet studly husband keeps giving me that weird look when I present to him my DIY world inspired projects that I’m just SO sure will be such a piece of cake and will turn out marvelously.
With all my new house ideas, he’s getting lots of practice with that look. :)
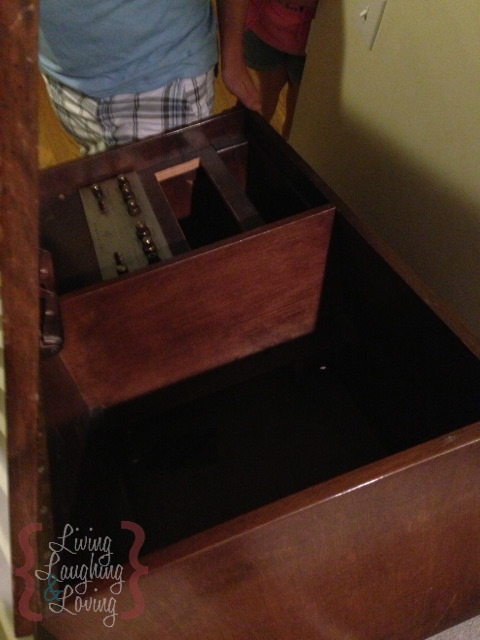
To make the magic happen, we pretty much just had to take out the electrical console part and that purty thing was ready to be a trunk. It was really easy to take out… or at least, it LOOKED really easy to me while I was watching Chris do it, ha!
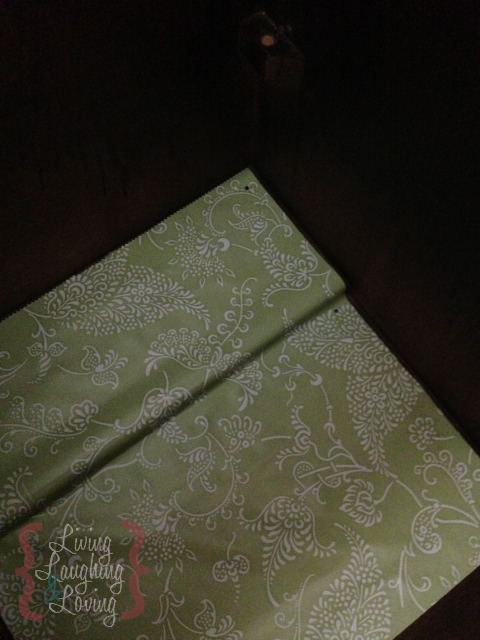
It needed a very good cleaning {remember that vintage dust I told you it came with?} and the bottom surface was very rough like sandpaper. It was not easy to clean because that rough surface just sort of grabbed at the cleaning cloth as I wiped it.

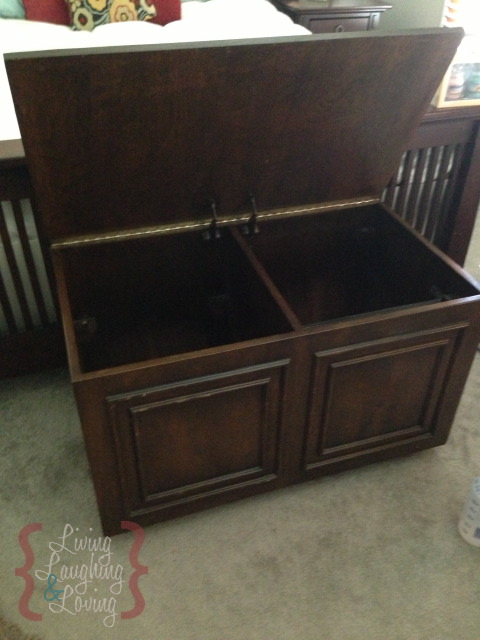
I decided to line it with some contact paper I happen to have that I think was from the dollar store based on its AMAZINGLY superior quality.
It refused to stick. Stubbornly REFUSED.
To make it even more ridiculous, I had even followed a trick initially that I remembered reading about wetting the contact paper to allow you to reposition it exactly where you wanted it before it got completely attached.
Uh, no. We definitely did NOT have that problem.
It might as well have been wrapping paper.
However, I was not deterred and was equally as stubborn as my dollar store paper and determined that this was GOING to work.
I resorted to a hammer and nails and got her done. So there.
I think it’s pretty neat to have such a unique vintage piece that I know I rescued from a life of no purpose. :)

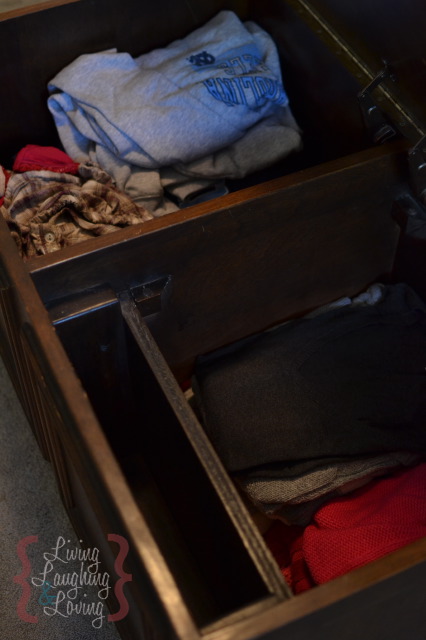
Are you curious what’s IN our little trunk? I decided that this would be a great spot for my sweaters since they were previously residing in a cardboard box in the corner.
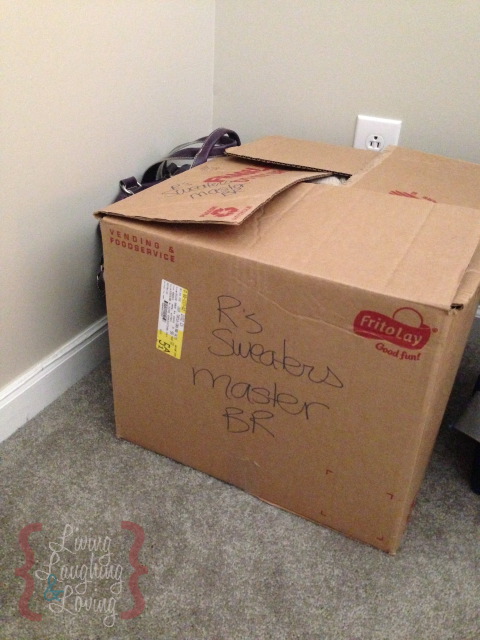
This is a much better home for them.
What do you think? Would you guess by looking at it, that it’s an electronic from the 70’s?? Ha!
Not bad for $4.99, right?
Isn’t it fun to repurpose something for C-H-E-A-P?


It’s also a very nice and sturdy place to sit while I put on my shoes. I wonder how many kids were told to “get off” that piece of furniture?
Hi Renee,
This a great find and so cheap! I love those bargains. And what a perfect solution for your sweaters!
Very nice!
I’d say for $4.99 you did VERY well! =)
Such a great piece (and price), Renee! And a much cuter storage option than the cardboard box.